Using AVR Studio for Developing Embedded Apllication by 8-bit AVR All AVR Tutorials
8051
DEVELOPMENT BOARD
64 KB Flash Memory
2KB Serial EEPROM
Serially Programmable
Click on Image to enlarge
ADVERTISEMENT
because information matters Tutorials | Infoletters | News | Search
Logos and brand names used in this site are belonging to their respected owners. We have used them here only for the purpose of information. Enable Active X control from internet options of internet explorer to view all element of this site.
Best viewed in 1024x768 pixels
RSS FEED
How to use and integrate AVR STUDIO/Atmel Studio with GCC Compiler for ATMEL AVR 8-Bit Series MCU
May-2012
AVR is a 8 bit RISC Processor, which was originally developed by two students at the Norwegian Institute of Technology, named as Alf-Egil Bogen and Vegard Wollan. It is understood that the name AVR stands for Alf Vegard RISC. Now AVR is under the umbrella of Atmel Co. Atmel has developed five different groups of AVR
tinyAVR
This series have low pin count usually 32 pins, and low peripherals. Suitable for small applications.
megaAVR
This series have internal memory in 100s of KBs and has instruction for multiply and divide, suitable for small and medium level applications.
XMEGA
This series include support for cryptograpy and large internal memory, and suitable for applications like smart cards etc.
Application Specific AVR
With this series Atmel has launched application specific processors, like AVR chip with support of USB, AVR with support CAN etc.
32-bit AVR
These processors are of 32 bit and suitable to run OS like Linux etc. This series include SIMD and DSP instructions. These chips are used in high end applications like settop box, media players etc.
FPSLIC (AVR + FPGA)
AVR core with FPGA on a single chip, making it wonderful to implement users circuit in the chip itself.
For more information please visit
http://www.atmel.com/products/microcontrollers/avr/default.aspx
Following tutorial describe use of AVR Studio, which is the IDE include GCC compiler for AVR. This article describe step by step use of AVR studio.
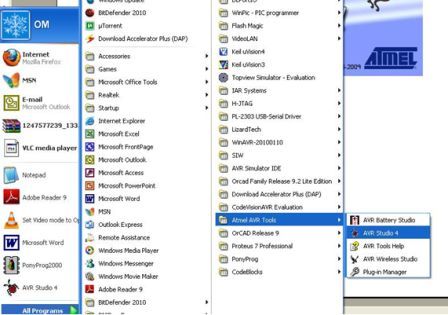
Step1: After installing AVR Studio and AVR GCC. Click on AVR Studio 4 shown below.
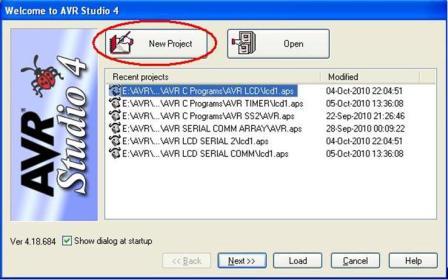
Step 2 : Click on New Project.
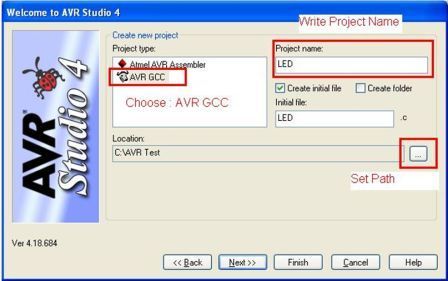
Step 3: Select Complier AVR GCC, Set Path and Project Name, and then Click Next.
NOTE: Please note WINAVR must install before AVR GCC Complier.
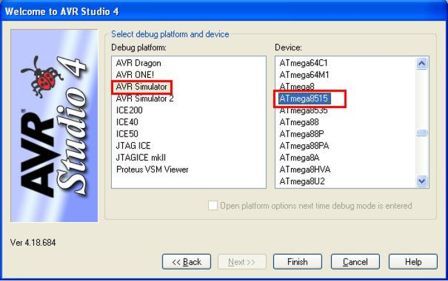
Step 4: Select AVR Simulator and ATmega8515 MCU, then click Finish.
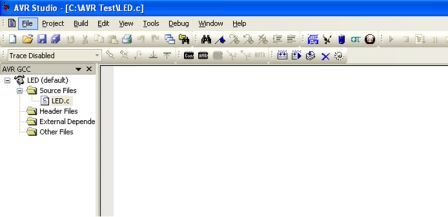
Step 5: After that you see LED.c already added.
Step 6: After that you see LED.c already added. Write or Copy paste code in LED.C
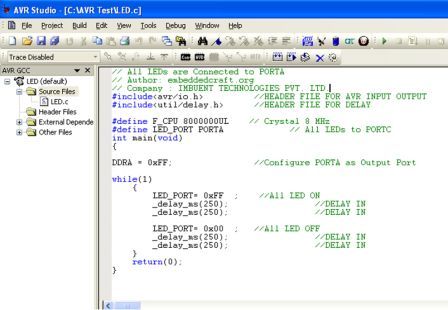
// Company : IMBUENT TECHNOLOGIES PVT. LTD.
#include<avr/io.h> //HEADER FILE FOR AVR INPUT OUTPUT
#include<util/delay.h> //HEADER FILE FOR DELAY
#define F_CPU 8000000UL // Crystal Frequency 8 MHz
#define LED_PORT PORTA // All LEDs to PORTC
int main(void)
{
DDRA = 0xFF; //Configure PORTA as Output Port
while(1)
{
LED_PORT= 0xFF ; //All LED ON
_delay_ms(250); //DELAY IN
_delay_ms(250); //DELAY IN
LED_PORT= 0x00 ; //All LED OFF
_delay_ms(250); //DELAY IN
_delay_ms(250); //DELAY IN
}
return(0);
}
Step 7 : Code after pasted in LED.c file
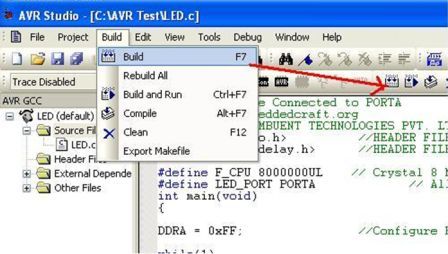
Step 8: Now click on build
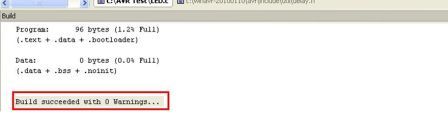
Step 9: Now you see Build Succeeded with 0 Warning
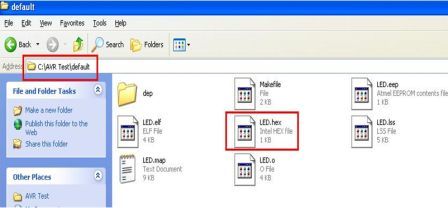
Step 10: Now Open C:\AVR Test\default you will see LED.hex is created. Download Hex file in Target Board.
For Testing on AVR Simulator
Step 11: Because we have also select AVR Simulator at Step4.
We can also test code without Hardware on Simulator.
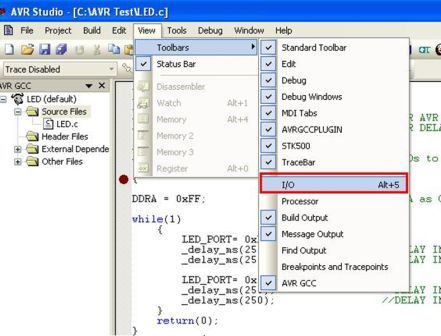
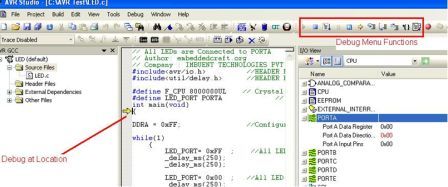
Go to >> View >> Toolbars>> I/O
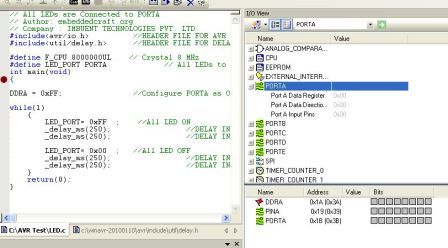
Step 12: Following windows will be shown to you
Step 12: Following windows will be shown to you.
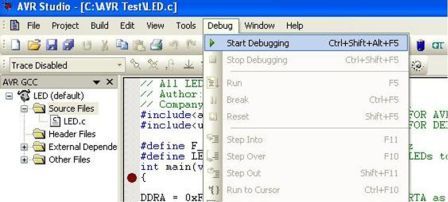
Step 13: Here you can debug your code using Debug Menu Functions
Now you can keep single stepping, content of port A will be keep modifying.
In this way there are many other features of AVR Studio. From AVR studio v6, now studio is referred as Atmel Studio, and this include support of ARM and AVR both. For ARM it support ARM Cortex-M.
Following webpage should be referred for Atmel Studio
http://www.atmel.com/Microsite/atmel_studio6/